Visačka na diskotéku
Zo stránky SensorWiki
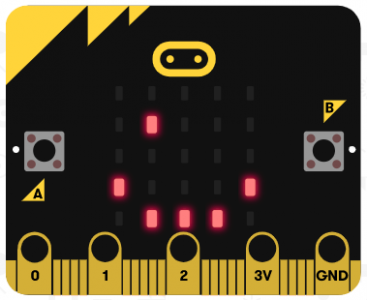
Vyrobíme jednoduchú visačku na diskotéku. Po zapnutí sa na displeji zobrazí znak ✓, ktorým dáme na javo, že zariadenie je pripravené. Emocionálny stav nositeľa tejto visačky sa dá meniť tlačidlami. Po stlačení ľavého tlačidla 🅐 sa zobrazí na displeji veselý smajlík 😀, po stlačení 🅑 sa zobrazí smutný smajlík ☹ a po stlačení oboch 🅐+🅑 súčasne sa zobrazí "tajný symbol" ❤ pre toho pravého...
-
Prvý program...
-
...bude vyzerať v simulátore takto.
Visacka na diskoteku:
basic.showIcon(IconNames.Yes)

input.onButtonPressed(Button.A, function () {
    basic.showIcon(IconNames.Happy)
})
input.onButtonPressed(Button.B, function () {
    basic.showIcon(IconNames.Sad)
})
input.onButtonPressed(Button.AB, function () {
    basic.showIcon(IconNames.Heart)
})
from microbit import *

display.show(Image.YES)

while True:
    if button_a.is_pressed() and button_b.is_pressed():
        display.show(Image.HEART)
        sleep(500)
    elif button_a.is_pressed():
        display.show(Image.HAPPY)
    elif button_b.is_pressed():
        display.show(Image.SAD)
#include <Adafruit_Microbit.h>

Adafruit_Microbit_Matrix microbit;

const uint8_t SMILEY_HAPPY[] = { B00000, B01010, B00000, B10001, B01110,};
const uint8_t   SMILEY_SAD[] = { B00000, B01010, B00000, B01110, B10001,};

void setup() {
   pinMode(PIN_BUTTON_A, INPUT);
   pinMode(PIN_BUTTON_B, INPUT);

   microbit.begin();
   microbit.show(microbit.YES);
   delay(1000);
}

void loop() {

  if (! digitalRead(PIN_BUTTON_A) && ! digitalRead(PIN_BUTTON_B))
  {
       microbit.show(microbit.HEART);
       delay(500);
  }

 if (! digitalRead(PIN_BUTTON_A))
  {
       microbit.show(SMILEY_HAPPY);
  }

  if (! digitalRead(PIN_BUTTON_B))
  {
        microbit.show(SMILEY_SAD);
  }


}
#include "MicroBit.h"

MicroBit uBit;

MicroBitImage HEART("0,1,0,1,0 \n"
                    "1,1,1,1,1 \n"
                    "1,1,1,1,1 \n"
                    "0,1,1,1,0 \n"
                    "0,0,1,0,0 \n");

MicroBitImage SMILEY_HAPPY("0,0,0,0,0\n 0,1,0,1,0\n 0,0,0,0,0\n 1,0,0,0,1\n 0,1,1,1,0\n");
MicroBitImage   SMILEY_SAD("0,0,0,0,0\n 0,1,0,1,0\n 0,0,0,0,0\n 0,1,1,1,0\n 1,0,0,0,1\n");
MicroBitImage          YES("0,0,0,0,0\n 0,0,0,0,1\n 0,0,0,1,0\n 1,0,1,0,0\n 0,1,0,0,0\n");


void onButtonA(MicroBitEvent e)
{
    uBit.display.print(SMILEY_HAPPY);
}

void onButtonB(MicroBitEvent e)
{
    uBit.display.print(SMILEY_SAD);
}

void onButtonAB(MicroBitEvent e)
{
    uBit.display.print(HEART);
}

int main()
{
    uBit.init();  // setup
     // Register to receive events when any buttons are clicked, including the A+B virtual button (both buttons at once).
    uBit.messageBus.listen(MICROBIT_ID_BUTTON_A,  MICROBIT_BUTTON_EVT_CLICK, onButtonA);
    uBit.messageBus.listen(MICROBIT_ID_BUTTON_B,  MICROBIT_BUTTON_EVT_CLICK, onButtonB);
    uBit.messageBus.listen(MICROBIT_ID_BUTTON_AB, MICROBIT_BUTTON_EVT_CLICK, onButtonAB);

    uBit.display.print(YES);


   // We're done, so just enter a power efficient sleep while we wait for an event.
    while (1)
        uBit.sleep(10000);
}
Späť na zoznam príkladov....

