AVR StudioTutorial: Rozdiel medzi revíziami
Zo stránky SensorWiki
Bez shrnutí editace |
|||
| Riadok 26: | Riadok 26: | ||
First, we have to select the Project type: | First, we have to select the Project type: | ||
* '''Atmel AVR Assembler''': This informs AVR Studio that is should use the built-in Assembler when compiling the project. We'll use this option in the following example. | |||
* AVR GCC compiler: This option enables the user to use an external gcc compiler when compiling and linking the project. | |||
Select the "Atmel AVR Assembler" Project type. | Select the "Atmel AVR Assembler" Project type. | ||
Verzia z 07:27, 24. september 2010
for version 4
Starting AVR Studio
- Start the AVR Studio program by clicking on:
Start->Programs->ATMEL AVR Tools->AVR Studio 4
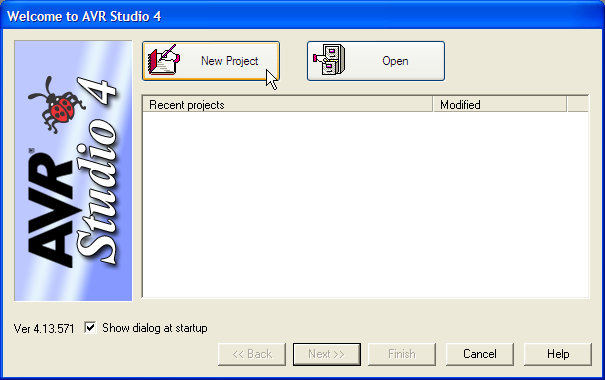
Once the program has started, you will be looking at a screen like this.

Creating a New Project
Immediately after the start, the popup window will appear. You can open an old project or create a new one. To create a new project, select "New Project".

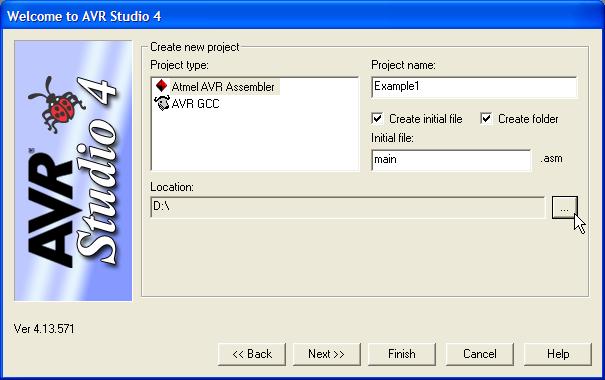
The dialog box shown in the next figure appears. In this dialog box you should enter the type of the project, its name and location.

First, we have to select the Project type:
- Atmel AVR Assembler: This informs AVR Studio that is should use the built-in Assembler when compiling the project. We'll use this option in the following example.
- AVR GCC compiler: This option enables the user to use an external gcc compiler when compiling and linking the project.
Select the "Atmel AVR Assembler" Project type.
Next, we have to assign a name to our project. We choose the name Example1 here, but this could of course be an arbitrary name. Wa also choose the name of the main source file as main.asm, but this usually can be the same name as the project.
Next you'll have to select the project location. This is the location where AVR Studio will store all files associated with the project. We have used the location D:\ as the folder. If the folder does not exist, AVR Studio will automatically create it without any further notification.
Now press the 'Next' button to continue.