Raspbery Pi Headless: Rozdiel medzi revíziami
Zo stránky SensorWiki
Vytvorená stránka „Postup ako rozbehať na RPi headless pripojenie (t.j. bez monitora, klávesnice a myšky). 1. Na SD kartu nahráme OS Raspbian https://www.raspberrypi.com/software/…“ |
Bez shrnutí editace |
||
| (2 medziľahlé úpravy od rovnakého používateľa nie sú zobrazené.) | |||
| Riadok 4: | Riadok 4: | ||
https://www.raspberrypi.com/software/ | https://www.raspberrypi.com/software/ | ||
[[Súbor:RaspberryPi-install01.png]] | [[Súbor:RaspberryPi-install01.png|center]] | ||
| Riadok 12: | Riadok 12: | ||
[[Súbor:RaspberryPi-install02.png]] | [[Súbor:RaspberryPi-install02.png|center]] | ||
3. Aby sme nastavili aj Wi-Fi pripojenie, treba v tom istom koreňovom adresári vytvoriť textový súbor 'wpa_supplicant.conf' s nasledovn7m obsahom | 3. Aby sme nastavili aj Wi-Fi pripojenie, treba v tom istom koreňovom adresári vytvoriť textový súbor 'wpa_supplicant.conf' s nasledovn7m obsahom | ||
| Riadok 26: | Riadok 26: | ||
} | } | ||
[[Súbor:RaspberryPi-install03.png]] | [[Súbor:RaspberryPi-install03.png|center]] | ||
4. Pripojenie cez SSH: Nainštalujeme [https://www.putty.org/ Putty] - je to SSH klient pre Windows. Pripojíme sa na adresu `raspberrypi` alebo `raspberrypi.local` | 4. Pripojenie cez SSH: Nainštalujeme [https://www.putty.org/ Putty] - je to SSH klient pre Windows. Pripojíme sa na adresu `raspberrypi` alebo `raspberrypi.local` | ||
a nebudeme zatiaľ riešiť IP adresu, ktorú by sme museli zisťovať na routri. | a nebudeme zatiaľ riešiť IP adresu, ktorú by sme museli zisťovať na routri. | ||
[[Súbor:RaspberryPi-install04.png]] | [[Súbor:RaspberryPi-install04.png|center]] | ||
5. Prihlásime sa ako user pi s default heslom raspberry. Hotovo! | 5. Prihlásime sa ako user pi s default heslom raspberry. Hotovo! | ||
[[Súbor:RaspberryPi-install05.png]] | [[Súbor:RaspberryPi-install05.png|center]] | ||
== vnc == | |||
6. Ak chceme aj grafický terminál, potrebujeme vnc. | |||
a) povolíme ho v pseudografickom konfiguračnom prostredí | |||
sudo raspi-config | |||
Select Interfacing Options | |||
Select VNC | |||
For the prompt to enable VNC, select Yes (Y) | |||
For the confirmation, select Ok | |||
b) asi by to mohlo ist aj z commandline, nie? | |||
6+. je to potrebne? Important! Change the default screen resolution | |||
There is a weird quirk where you must change the screen resolution or VNC will report "Cannot currently show the desktop." | |||
Still from within raspi-config: | |||
Select Display | |||
on older versions this was under Advanced Options | |||
Select Resolution | |||
Select anything but the default (example: 1024x768) | |||
Select Ok | |||
Once you've established that it works, you can go back and try other screen resolutions. | |||
Select Finish | |||
For the reboot prompt, select Yes | |||
7. Na PC nainštalujeme VNC Viewer | |||
https://www.realvnc.com/en/connect/download/viewer/ | |||
Po spustení cez File -> New Connection vytvoríme nove pripojenie | |||
[[Súbor:RaspberryPi-install06.png|center]] | |||
8. Po prihlaseni menom/heslom je hotovo! | |||
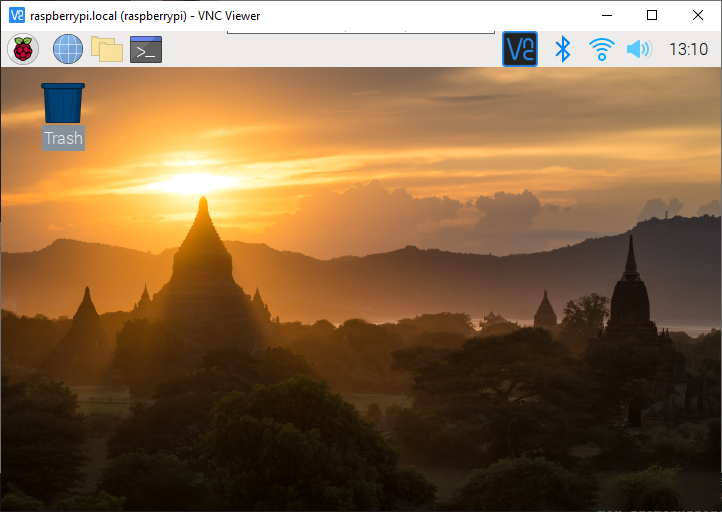
[[Súbor:RaspberryPi-install07.png|center]] | |||
Aktuálna revízia z 12:29, 10. december 2021
Postup ako rozbehať na RPi headless pripojenie (t.j. bez monitora, klávesnice a myšky).
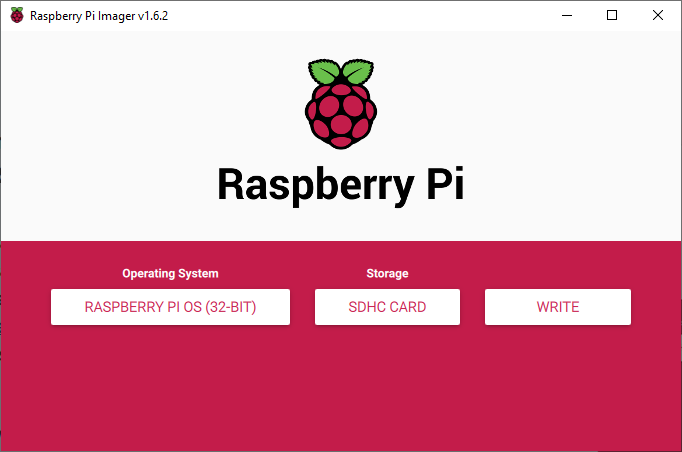
1. Na SD kartu nahráme OS Raspbian
https://www.raspberrypi.com/software/
2. Na pripravenej SD karte je jedna partícia čitateľná aj vo Windows. Na tejto partícii vytvoríme v koreňovom adresári prázdny súbor s názvom 'ssh' (bez prípony, 0B)
- Raspberry Pi OS automaticky povolí SSH (Secure Socket Shell).

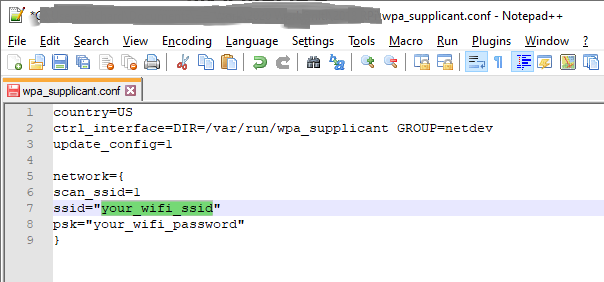
3. Aby sme nastavili aj Wi-Fi pripojenie, treba v tom istom koreňovom adresári vytvoriť textový súbor 'wpa_supplicant.conf' s nasledovn7m obsahom
country=US
ctrl_interface=DIR=/var/run/wpa_supplicant GROUP=netdev
update_config=1

network={
scan_ssid=1
ssid="your_wifi_ssid"
psk="your_wifi_password"
}
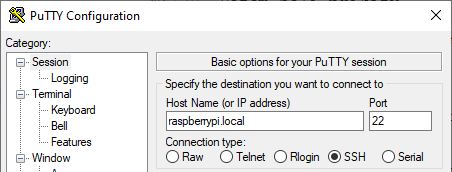
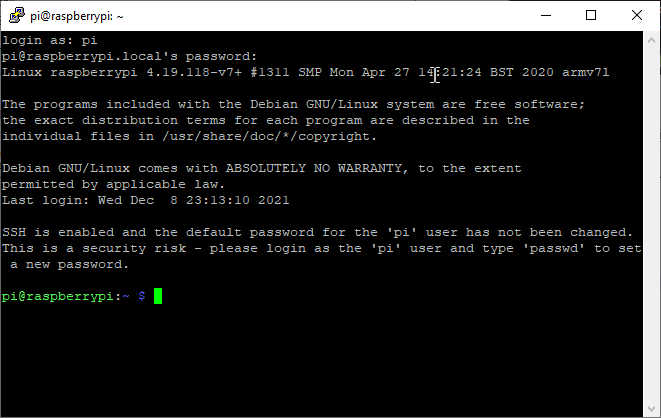
4. Pripojenie cez SSH: Nainštalujeme Putty - je to SSH klient pre Windows. Pripojíme sa na adresu `raspberrypi` alebo `raspberrypi.local` a nebudeme zatiaľ riešiť IP adresu, ktorú by sme museli zisťovať na routri.
5. Prihlásime sa ako user pi s default heslom raspberry. Hotovo!
vnc
6. Ak chceme aj grafický terminál, potrebujeme vnc.
a) povolíme ho v pseudografickom konfiguračnom prostredí
sudo raspi-config
   Select Interfacing Options
   Select VNC
   For the prompt to enable VNC, select Yes (Y)
   For the confirmation, select Ok
b) asi by to mohlo ist aj z commandline, nie?
6+. je to potrebne? Important! Change the default screen resolution
There is a weird quirk where you must change the screen resolution or VNC will report "Cannot currently show the desktop."
Still from within raspi-config:
   Select Display
       on older versions this was under Advanced Options
   Select Resolution
   Select anything but the default (example: 1024x768)
   Select Ok
Once you've established that it works, you can go back and try other screen resolutions.
   Select Finish
   For the reboot prompt, select Yes
7. Na PC nainštalujeme VNC Viewer
https://www.realvnc.com/en/connect/download/viewer/
Po spustení cez File -> New Connection vytvoríme nove pripojenie
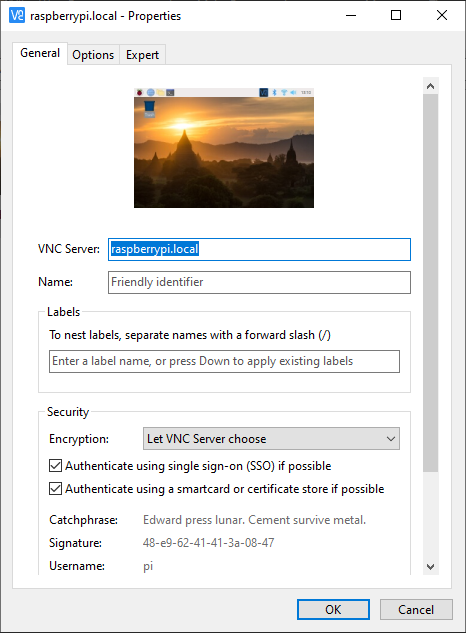
8. Po prihlaseni menom/heslom je hotovo!
