Aj Ty v IT: Rozdiel medzi revíziami
Zo stránky SensorWiki
| (13 medziľahlých úprav od rovnakého používateľa nie je zobrazených.) | |||
| Riadok 1: | Riadok 1: | ||
[[Súbor:logoAjTyvIT.png|right|150px]] | [[Súbor:logoAjTyvIT.png|right|150px]] | ||
= '''Svetielkujúci Workshop 7. a 14. 6. 2017''' = | = '''Svetielkujúci Workshop 18. 12. 2017''' = | ||
<!-- | |||
= '''Svetielkujúci Workshop 7. a 14. 6. 2017''' = | |||
--> | |||
<P Align="center"> | |||
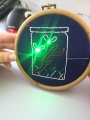
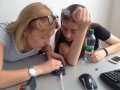
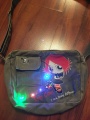
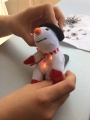
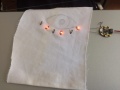
<gallery widths=120px heights=120px perrow=4 caption="Svetielkujuci Workshop 1 (jún 2017)"> | |||
File:FotoBlikBlik01.jpg | |||
File:FotoBlikBlik02.jpg | |||
File:FotoBlikBlik03.jpg | |||
File:FotoBlikBlik04.jpg | |||
File:FotoBlikBlik05.jpg | |||
File:FotoBlikBlik06.jpg | |||
File:FotoBlikBlik07.jpg | |||
File:FotoBlikBlik08.jpg | |||
</gallery> | |||
[[Súbor:wearableDef.png|500px]] | [[Súbor:wearableDef.png|500px]] | ||
| Riadok 13: | Riadok 25: | ||
* [http://senzor.robotika.sk/balogh/wearable.pdf Úvodná prezentácia] | * [http://senzor.robotika.sk/balogh/wearable.pdf Úvodná prezentácia] | ||
** [https://player.vimeo.com/video/114828162 Spider dress video] | ** [https://player.vimeo.com/video/114828162 Spider dress video] | ||
** [https://www.dezeen.com/2017/10/22/ying-gaos-dresses-become-animated-in-the-presence-of-strangers/ Ying Gaos dress] | |||
** [https://cutecircuit.com/wearable-technology/ Cute Circuit] | ** [https://cutecircuit.com/wearable-technology/ Cute Circuit] | ||
* [https://learn.adafruit.com/category/wearables Wearables od firmy Adafruit] | * [https://learn.adafruit.com/category/wearables Wearables od firmy Adafruit] | ||
| Riadok 21: | Riadok 34: | ||
** 5: [https://learn.adafruit.com/light-activated-pixel-heart/ Brošňa] | ** 5: [https://learn.adafruit.com/light-activated-pixel-heart/ Brošňa] | ||
== Krok za krokom == | == '''1. Krok za krokom''' == | ||
== 1. '''Blink''' == | == 1.1. '''Blink''' == | ||
* [http://ap.urpi.fei.stuba.sk/sensorwiki/index.php/Acrob02 Blink] | * [http://ap.urpi.fei.stuba.sk/sensorwiki/index.php/Acrob02 Blink] | ||
== 2. '''Železničné priecestie''' == | == 1.2. '''Železničné priecestie''' == | ||
* [https://youtu.be/YaH8DJpeYs0?t=1m6s Video] | * [https://youtu.be/YaH8DJpeYs0?t=1m6s Video] | ||
== 3. '''K.I.T.T. 2000''' == | == 1.3. '''K.I.T.T. 2000''' == | ||
* [https://youtu.be/iQwlrEdka6Q?t=5s Video] | * [https://youtu.be/iQwlrEdka6Q?t=5s Video] | ||
== 1.4. Ak to nefunguje... == | |||
...tak [[Acrob Settings|skontrolujte nastavenia]]. | |||
<BR> | |||
<BR> | |||
<BR> | |||
= | = '''2. A teraz už naozaj...''' = | ||
== Adafruit Gemma == | == 2.1. Adafruit Gemma == | ||
* [https://learn.adafruit.com/introducing-gemma/ Stránka u výrobcu so všetkými informáciami] | * [https://learn.adafruit.com/introducing-gemma/ Stránka u výrobcu so všetkými informáciami] | ||
| Riadok 57: | Riadok 76: | ||
[[Súbor:gemma_flora_selectusbtiny.gif|center]] | [[Súbor:gemma_flora_selectusbtiny.gif|center]] | ||
== 2.2. Blink == | |||
Príklad čiapky s obyčajnými LED diódami - ukážka šitia: https://learn.adafruit.com/adafruit-led-sequins/ | |||
Vyskúšame postupne jednoduché programy | Vyskúšame postupne jednoduché programy | ||
| Riadok 114: | Riadok 137: | ||
</source> | </source> | ||
Plynulá zmena intenzity svitu LED diody (funguje len na D0 a D1, na D2 NIE) | |||
<source lang="C"> | <source lang="C"> | ||
int intenzita; | |||
void setup() { | void setup() { | ||
intenzita = 0; | |||
pinMode(2,OUTPUT); | |||
} | } | ||
void loop() { | void loop() { | ||
intenzita = 0; | |||
for(int i=0; i<10 ; i++) | |||
{ | |||
intenzita = intenzita + 25; | |||
analogWrite(2,intenzita); | |||
} | |||
} | } | ||
</source> | |||
== 2.3. NeoPixel RGB == | |||
Priklady práce s inteligentnou RGB LED diódou [https://blog.adafruit.com/2013/08/30/adafruit-neopixel-uberguide/ Neopixel]. | |||
// | Napríklad takáto [https://learn.adafruit.com/led-masquerade-masks/neopixel-gemma-mask maska na maškarný bál...] | ||
ToDo: niekoľko pekných ukážkových programov, ktoré by sa dali vlastne aplikovať aj na obyčajné diódy http://moving-rainbow.readthedocs.io/en/latest/guide/list-of-sample-programs/ | |||
Schéma pripojenia | |||
[[Súbor:AdafruitNeoPixelConnection.jpg]] | |||
Základný príklad s jednou diódou | |||
<source lang="C"> | |||
#include <Adafruit_NeoPixel.h> | |||
#define PIN 1 | |||
Adafruit_NeoPixel LED = Adafruit_NeoPixel(1, PIN, NEO_GRB + NEO_KHZ800); | |||
void setup() { | |||
LED.begin(); | |||
// LED.setPixelColor(n, red, green, blue); | |||
LED.setPixelColor(0, 0, 0, 127); | |||
LED.show(); // Show the preset color(s) | |||
delay(2000); | |||
LED.setBrightness(100); | |||
} | |||
void loop() { | |||
// n R G B | |||
LED.setPixelColor(0, 255, 0, 127); | |||
delay(2000); | |||
LED.setPixelColor(0, 0 , 0, 0); | |||
delay(2000); | |||
} | } | ||
</source> | |||
Základný príklad s dvoma diódami | |||
<source lang="C"> | |||
#include <Adafruit_NeoPixel.h> | |||
#define PIN 1 | |||
Adafruit_NeoPixel LED = Adafruit_NeoPixel(1, PIN, NEO_GRB + NEO_KHZ800); | |||
void setup() { | |||
LED.begin(); | |||
LED.show(); // Show the preset color(s) | |||
LED.setBrightness(100); // Interval 0 - 255 | |||
} | } | ||
void loop() { | |||
// LED.setPixelColor(n, red, green, blue); | |||
LED.setPixelColor(0, 255, 0, 0); // First LED Red | |||
LED.setPixelColor(1, 0, 0, 127); // Second LED Blue | |||
LED.show(); | |||
delay(300); | |||
LED.setPixelColor(0, 0, 0, 127); // First LED Blue | |||
LED.setPixelColor(1, 255, 0, 0); // Second LED Red | |||
LED.show(); | |||
delay(300); | |||
} | } | ||
</source> | </source> | ||
A celkom na záver: ako prať elektronické odevy? | |||
https://learn.adafruit.com/washing-wearable-electronics/hand-wash?view=all | |||
=== Technicke informacie === | === Technicke informacie === | ||
Verzia z 08:22, 12. december 2017

Svetielkujúci Workshop 18. 12. 2017
- Svetielkujuci Workshop 1 (jún 2017)
-

-
-
-
-
-
-

-


Úvod
1. Krok za krokom
1.1. Blink
1.2. Železničné priecestie
1.3. K.I.T.T. 2000
1.4. Ak to nefunguje...
...tak skontrolujte nastavenia.
2. A teraz už naozaj...
2.1. Adafruit Gemma

V programovacom prostredí Arduino treba najprv nastaviť typ elektronickej dosky na Adafruit Gemma 8MHz v menu Tools->Board.

Potom ešte treba vybrať vhodný programovací protokol -
vyeberiete ho z menu Tools->Programmer->USBtinyISP

2.2. Blink
Príklad čiapky s obyčajnými LED diódami - ukážka šitia: https://learn.adafruit.com/adafruit-led-sequins/
Vyskúšame postupne jednoduché programy
/*   Blink 1  */

#define RED_LED 1

void setup() {

  pinMode(RED_LED, OUTPUT);

}

void loop() {
    digitalWrite(RED_LED, HIGH);
    delay(200);
    digitalWrite(RED_LED, LOW);
    delay(200);
}
/*   Blink 3  */

#define RED_LED 0
#define GREEN_LED 1
#define BLUE_LED 2

void setup() {

  pinMode(RED_LED, OUTPUT);
  pinMode(GREEN_LED, OUTPUT);
  pinMode(BLUE_LED, OUTPUT);

}

void loop() {
    digitalWrite(RED_LED, HIGH);
    delay(200);
    digitalWrite(RED_LED, LOW);
    delay(200);

    digitalWrite(GREEN_LED, HIGH);
    delay(200);
    digitalWrite(GREEN_LED, LOW);
    delay(200);

    digitalWrite(BLUE_LED, HIGH);
    delay(200);
    digitalWrite(BLUE_LED, LOW);
    delay(200);

}
Plynulá zmena intenzity svitu LED diody (funguje len na D0 a D1, na D2 NIE)
int intenzita;

void setup() {
    intenzita = 0;
    pinMode(2,OUTPUT);
}

void loop() {
    intenzita = 0;
    for(int i=0; i<10 ; i++)
    {
        intenzita = intenzita + 25;
        analogWrite(2,intenzita);
    }

}
2.3. NeoPixel RGB
Priklady práce s inteligentnou RGB LED diódou Neopixel.
Napríklad takáto maska na maškarný bál...
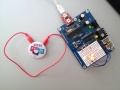
ToDo: niekoľko pekných ukážkových programov, ktoré by sa dali vlastne aplikovať aj na obyčajné diódy http://moving-rainbow.readthedocs.io/en/latest/guide/list-of-sample-programs/ Schéma pripojenia
![]()
Základný príklad s jednou diódou
#include <Adafruit_NeoPixel.h>

#define PIN 1

Adafruit_NeoPixel LED = Adafruit_NeoPixel(1, PIN, NEO_GRB + NEO_KHZ800);

void setup() {

   LED.begin();
// LED.setPixelColor(n, red, green, blue);
   LED.setPixelColor(0, 0, 0, 127);
   LED.show(); // Show the preset color(s)
   delay(2000);
   LED.setBrightness(100);
   }

void loop() {
 //                 n   R   G   B
  LED.setPixelColor(0, 255, 0, 127);
  delay(2000);
  LED.setPixelColor(0,  0 , 0, 0);
  delay(2000);

}
Základný príklad s dvoma diódami
#include <Adafruit_NeoPixel.h>

#define PIN 1

Adafruit_NeoPixel LED = Adafruit_NeoPixel(1, PIN, NEO_GRB + NEO_KHZ800);

void setup() {

   LED.begin();
   LED.show(); // Show the preset color(s)
   LED.setBrightness(100);  // Interval 0 - 255
}

void loop() {

  // LED.setPixelColor(n, red, green, blue);
     LED.setPixelColor(0, 255, 0, 0);  // First LED Red
     LED.setPixelColor(1, 0, 0, 127);  // Second LED Blue
     LED.show();
     delay(300);
     LED.setPixelColor(0, 0, 0, 127);  // First LED Blue
     LED.setPixelColor(1, 255, 0, 0);  // Second LED Red
     LED.show();
     delay(300);


}
A celkom na záver: ako prať elektronické odevy?
https://learn.adafruit.com/washing-wearable-electronics/hand-wash?view=all
Technicke informacie
- Adafruit Gemma Windows Driver: https://learn.adafruit.com/introducing-gemma/windows-setup
- Adafruit Board Arduino Manager: https://adafruit.github.io/arduino-board-index/package_adafruit_index.json
- Neopixel Library: https://github.com/adafruit/Adafruit_NeoPixel