Interaktívna hracia doska
Zo stránky SensorWiki
| Autor: | Meno Priezvisko | |
| Študijný odbor: | Aplikovaná informatika | 3. Bc. (2019) |
Opis projektu
Cieľom projektu je vytvoriť Interaktívnu hraciu dosku so stimulujúcimi podnetmi, určené pre deti so špecialnými potrebami.
Prečo?
- Osobný prínos: práca s Arduinom Uno a s jeho komponentmi
- Spoločenský prínos: Naučiť deti využívať vypínače v domácom prostredí, prostredníctvom našej interaktívnej hracej dosky
Komponenty dosky
Sem príde podrobný návod na výrobu.
- Arduino Uno
- 3 striedavé vypínače
- 3 statické vypínače
- LED RGB modul Keyes 5050
- DFPlayer Mini Mp3 modul
- Reproduktor
- SD karta
- Zdroj
- Doska
Analýza a výrobný proces
V tejto časti popíšete ako idete daný problém riešiť. Uvediete sem aj všetky potrebné technické údaje, ktoré sú potrebné na úspešné vyriešenie projektu. Napríklad:
- popis komunikačnej zbernice (i2c, 1-wire, RS-232 a pod.)
- obrázok zapojenia vývodov použitej súčiastky
- odkaz na katalógový list
- priebehy dôležitých signálov
- este jedna polozka
Popis riešenia
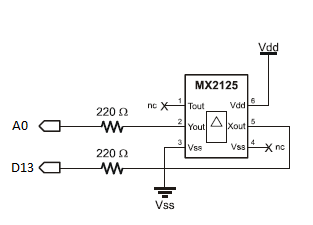
Sem opíšete ako konkrétne ste problém vyriešili. Začnite popisom pripojenia k procesoru (nezabudnite na schému zapojenia!) a zdôraznite ktoré jeho periférie ste pritom využili.
Pozn.: Názov obrázku musí byť jedinečný, uvedomte si, že Obr1.jpg už pred vami skúsilo nahrať už aspoň 10 študentov.

Algoritmus a program
Algoritmus pre našu dosku.
/*******************************************************************************
 * DFPlayer_Mini_Mp3, This library provides a quite complete function for      *
 * DFPlayer mini mp3 module.                                                   *
 * www.github.com/dfrobot/DFPlayer_Mini_Mp3 (github as default source provider)*
 *  DFRobot-A great source for opensource hardware and robot.                  *
 *                                                                             *
 * This file is part of the DFplayer_Mini_Mp3 library.                         *
 *                                                                             *
 * DFPlayer_Mini_Mp3 is free software: you can redistribute it and/or          *
 * modify it under the terms of the GNU Lesser General Public License as       *
 * published by the Free Software Foundation, either version 3 of              *
 * the License, or any later version.                                          *
 *                                                                             *
 * DFPlayer_Mini_Mp3 is distributed in the hope that it will be useful,        *
 * but WITHOUT ANY WARRANTY; without even the implied warranty of              *
 * MERCHANTABILITY or FITNESS FOR A PARTICULAR PURPOSE.  See the               *
 * GNU Lesser General Public License for more details.                         *
 *                                                                             *
 * DFPlayer_Mini_Mp3 is distributed in the hope that it will be useful,        *
 * but WITHOUT ANY WARRANTY; without even the implied warranty of              *
 * MERCHANTABILITY or FITNESS FOR A PARTICULAR PURPOSE.  See the               *
 * GNU Lesser General Public License for more details.                         *
 *                                                                             *
 * You should have received a copy of the GNU Lesser General Public            *
 * License along with DFPlayer_Mini_Mp3. If not, see                           *
 * <http://www.gnu.org/licenses/>.                                             *
 *                         *
 ******************************************************************************/

/*
 *  Copyright:  Rhydolabz
 *  name:   DFPlayer_Mini_Mp3 sample code
 *  Author:   leff <>
 *  Date:   2015-5-29
 *  Description:  connect DFPlayer Mini by SoftwareSerial, this code is test on Uno
 **Wire: **Board : Uno
    *Pin10 - player TX;
    *Pin11 - player RX;
    *pin3  - player BUSY

 *  Note: the mp3 files must put into mp3 folder in your tf card
 */

 /***************************************************
DFPlayer - A Mini MP3 Player For Arduino
 <https://www.dfrobot.com/index.php?route=product/product&product_id=1121>

 ***************************************************
 This example shows the basic function of library for DFPlayer.

 Created 2016-12-07
 By [Angelo qiao](Angelo.qiao@dfrobot.com)

 GNU Lesser General Public License.
 See <http://www.gnu.org/licenses/> for details.
 All above must be included in any redistribution
 ****************************************************/

/***********Notice and Trouble shooting***************
 1.Connection and Diagram can be found here
 <https://www.dfrobot.com/wiki/index.php/DFPlayer_Mini_SKU:DFR0299#Connection_Diagram>
 2.This code is tested on Arduino Uno, Leonardo, Mega boards.
 ****************************************************/

#include "Arduino.h"
#include "SoftwareSerial.h"
#include "DFRobotDFPlayerMini.h"

SoftwareSerial mySoftwareSerial(12, 13); // RX, TX
DFRobotDFPlayerMini myDFPlayer;
void printDetail(uint8_t type, int value);

const int buttonSound_1_Pin = 9;
const int buttonSound_2_Pin = 10;
const int buttonSound_3_Pin = 11;

const int buttonRed_Pin = 5;
const int buttonGreen_Pin = 4;
const int buttonBlue_Pin = 3;

const int button2Pin = 8; //LED BUTTON
//const int redPin = 7;
int buttonSound_1_State = 0;
int buttonSound_2_State = 0;
int buttonSound_3_State = 0;

int buttonRed_State = 0;
int buttonGreen_State = 0;
int buttonBlue_State = 0;

int button2State = 0;

int red_Pin= 8;
int green_Pin = 6;
int blue_Pin = 7;

boolean counter = true;
void setup()
{
  // initialize the pushbutton pin as an input:
  pinMode(buttonSound_1_Pin, INPUT);
  pinMode(buttonSound_2_Pin, INPUT);
  pinMode(buttonSound_3_Pin, INPUT);

  pinMode(buttonRed_Pin, INPUT);
  pinMode(buttonGreen_Pin, INPUT);
  pinMode(buttonBlue_Pin, INPUT);

  pinMode(red_Pin, OUTPUT);
  pinMode(green_Pin, OUTPUT);
  pinMode(blue_Pin, OUTPUT);

  mySoftwareSerial.begin(9600);
  Serial.begin(115200);

  if (!myDFPlayer.begin(mySoftwareSerial)) {  //Use softwareSerial to communicate with mp3.
    while(true);
  }
//  myDFPlayer.volume(30);  //Set volume value. From 0 to 30
}

void loop()
{
  static unsigned long timer = millis();
  /*****************BUTTON STATE BEGIN**********************/
  buttonSound_1_State = digitalRead(buttonSound_1_Pin);
  buttonSound_2_State = digitalRead(buttonSound_2_Pin);
  buttonSound_3_State = digitalRead(buttonSound_3_Pin);

  buttonRed_State = digitalRead(buttonRed_Pin);
  buttonGreen_State = digitalRead(buttonGreen_Pin);
  buttonBlue_State = digitalRead(buttonBlue_Pin);
  /*****************BUTTON STATE END**********************/


  /*****************COLOR BEGIN**********************/
   if(buttonRed_State == LOW){
    setColor(255,0,0);
   } else {
    setColor(0,0,0);
   }

   if(buttonGreen_State == LOW){
    setColor(0,255,0);
   } else {
    setColor(0,0,0);
   }

   if(buttonBlue_State == LOW){
    setColor(0,0,255);
   } else {
    setColor(0,0,0);
   }
   /*****************COLOR END**********************/

  /*****************SOUND BEGIN**********************/
  // check if the pushbutton is pressed. If it is, the buttonState is HIGH:
  if (buttonSound_1_State == 1) {
       if (millis() - timer > 1500) {
          timer = millis();
          myDFPlayer.volume(30);  //Set volume value. From 0 to 30
          myDFPlayer.play(1);  //Play the first mp3 //krava
        }
  }

  if (buttonSound_2_State == 1) {
       if (millis() - timer > 1500) {
          timer = millis();
          myDFPlayer.volume(20);  //Set volume value. From 0 to 30
          myDFPlayer.play(2);  //Play the first mp3 //kohut
        }
  }

  if (buttonSound_3_State == 1) {
       if (millis() - timer > 1500) {
          timer = millis();
          myDFPlayer.volume(15);  //Set volume value. From 0 to 30
          myDFPlayer.play(3);  //Play the first mp3 //macka
        }
  }
  /*****************SOUND END**********************/
}

void setColor(int redValue, int greenValue, int blueValue) {
  digitalWrite(red_Pin, redValue);
  digitalWrite(green_Pin, greenValue);
  digitalWrite(blue_Pin, blueValue);

}
Výsledok
Nezabudnite zdokumentovať výsledok vašej práce. Určite sem patria fotografie, video a zhodnotenie ako ste spokojní s výsledkom,
Kľúčové slová 'Category', ktoré sú na konci stránky nemeňte.
